My Photography Workflow

Every photographer (from your National Geographic professional to your point and shoot tourist) has some kind work flow for post production of photos. For most, it’s dump the photos onto a computer and upload to a photo sharing website. Each person has their own way of doing it, but not too many people think about it and so I wanted to give people the opportunity to think a little more about how they process their photos. Here’s my workflow model and why I do things the way I do.
Concepts
- Shoot on the highest detail setting your camera will allow.
- When unloading photos onto your computer, use an application to automagically organize the photos
- Have a backup solution. Photos stored on a hard drive of any kind is not a backup solution.
- Keep your favorites within a few clicks
Â

Start Strong, Finish Strong
Shooting in the highest quality your camera provides, allows you to be extremely flexible later on in life. If you shoot in a lower quality setting to save room on your camera’s memory card, you’ll be sorry when you want to blow that photo up to a 8×12 image (or 8×10 if you don’t mind the crop). It’ll look grainy, blurry and most importantly you’ll always have that feeling of “what if?” Buy a larger memory card, there’s absolutely no excuse when you can get a 2GB memory card for $25 or less.
The Power of RAW
If your camera supports it, shoot in RAW format. This feature is limited to higher end cameras usually in the dSLR category, but more and more point and shoots are allowing people to revel in the power that is RAW. One contra to shooting in RAW is that your photo workflow will require a bit more TLC (tender loving care). This is because RAW format is straight off the boat; no polish, no flare, barely resembling a photograph at all, except a whole lot of ambition to be something greater than a machine made JPEG with no sense of art or love.
The RAW format contains magic. Its magic includes the ability to recover photos that are severely under/over exposed. For example, an area that is completely black (perhaps you shot your mother with the sun directly behind her so that she looked more like a ghastly wraith than the lovely woman she is) can be recovered to some degree (it’s magic, not divine benevolence). JPEG on the other hand will throw out all that magical information and just make those pixels black, making recovery impossible. That magic does incur a file size cost, but we’ll deal with that a little later.
Make the Computer Your Photo Slave
I know some people (professional photographers, mind you) that still organize their photos into folders on their computer’s hard drive. They have their own system for dating, categorizing and storing those photos. That solution may be fine if you only use your camera 2 or 3 times a year. The problem stems from the fact that it doesn’t scale very well. Unless you have a photographic memory (in which case, why do you have a camera?), try remembering which folder contains that photo of your adorable puppy with his favorite toy you took 4 years ago (or was it 5 years ago). You need a better solution.
Big Brother, Little Brother
I upload my photos, first thing, into Adode’s Lightroom. It’s the professional photographer’s Photoshop without all the brushes and magic wands. A more than comparable alternative is Apple’s Aperture. This vital piece of software allows me to easily scan through the photos from that day’s shoot and see how things came out. I then go through and immediately delete any photos that I know I will never want. These are strictly limited to blurry, out of focus or other photos that are hopeless. Keep everything else, no matter what. Then before I start any actual processing, I take the remaining photos (in RAW format) and drag them out of Lightroom and into a folder labeled as such:
YYYY-MM-DD – Event Name – Location
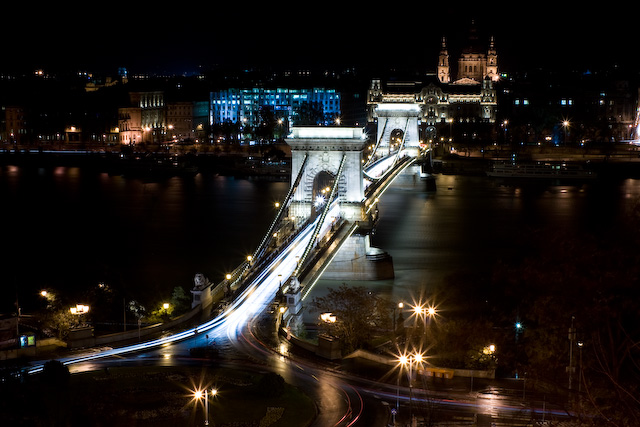
Example: 2006-12-01 HÅ‘sök tere – Budapest
Then I begin my work making the photos look their best. I usually don’t bother editing the photos that I don’t like, but I still keep them anyway (you never know).
Â

After all the photos are ready to go, I export them out as JPEGs at 1280×853 (large enough to use as a desktop background) and 80-85% quality, which will drastically reduce the file size but still preserve the look of the image. These are meant as a final product that will cover most uses for the photos.
Those exported photos then go into Apple’s iPhoto since, with iPhoto, you can preview thousands of photos as smooth as butter. Usually I’ll then create an album in iPhoto with those photos. iPhoto is a great compliment to Lightroom and it also gives me the ability to upload to photo sharing websites such as Picasaweb and Flickr using iPhoto’s export feature and a plugin for the respective site.
Then, I do the unimaginable. I delete all the photos in Lightroom. I do this for several reasons. First, I have all the edited photos exported in a form that is the most useful (reduced file size and a more flexible image size). Second, all the RAW files are already saved somewhere else. I lied. I don’t delete ALL the files. I will keep the photos that I absolutely LOVE, with the criteria of possible submissions to photo contests or printing the photo out to a large format (8×12, 20×30, etc). That way I keep all my favorites (which is about 1 photo in 1000 taken) within a few clicks.
Lightroom has the same viewing capabilities as iPhoto, maybe even better, but why keep those massive RAW images around and mucking up your workflow? I keep the photos in Lightroom until I’m done processing them. So that only leaves two kinds of photos in Lightroom: ones I need to process and export and the absolute best of the best. It keeps things separate and organized.
Â
Lost your life? Restore it from disc.
We all know we should back up our precious data, our work that’s taken years to acquire and our photos. The problem is that we’re not sure of a good way to back up our data. We can use Leopard’s new Time Machine or another automatic backup solution but it’s not really a solution. 1s and 0s are never safe, but putting them on a “backup” hard drive is bound to fail, even if the hard drives are redundant (I’ve seen it where two mirrored hard drives failed at the same time).
My solution is DVD backup. Specifically high quality DVD+R. The +R variety has parity and other error checking that will resolve errors in the data in the event of a few corrupt bytes. The -R DVDs do not and any corruption of the 1s and 0s on that disc means that you just lost that photo of your late grandmother, never to be seen again (maybe a hyperbole but I don’t take risks with this kind of thing).
When I have enough folders to burn a full DVD with, I burn that DVD with a name in the format of:
YYYY-MM_-_YYYY-MM
Ex. 2005-05_2005-06
Then of course, I label the DVD with the applicable date ranges and maybe a description if I feel like it. Then the DVD goes into a case, because what’s the point of putting it on proper media if you’re just going to scratch it up.
Here’s a great post from someone who knows more on the subject of DVD archival than I do (that’s not saying much!). Having said all that, even DVDs are not immune to spontaneous byte flipping but it’s less volatile than hard drives.
Â
When You’re Old and Grey: Stories to Tell Your Grandkids
The files in iPhoto are the same exact name as the photos on the backup DVD. Plus iPhoto knows the date the photo was taken. So, if for some reason you need the original image you can easily find it in iPhoto, note the date and image number and search no more than two DVDs to find it ( 2006-03_2006-05 and 2006-05_2006-07). You can add a day field to the naming structure if you want, but I found this to complicate things more than it helps.
Â
When in Rome, Do as the Germans
This is of course the way I do things, but I only mean it as a guide for people who are still figuring out the best workflow for them. Some people prefer Adobe’s Bridge + Photoshop as opposed to Lightroom, for example, so their workflow will be affected by that.
Finally, don’t be intimidated by all the professional software and technical aspects of this. Things change and workflows will evolve, but hopefully this gave you a good idea of how to construct your own workflow no matter if you’re a professional photographer or someone who only takes a few photos a month.
Don’t forget one important item – find a software program that will catalog your CD/DVD’s and the individual folders and files on each one. We have almost 7,000 discs of client files going back to 1995, and I’d be lost without my -ahem, I am going to type that non-fruity prefix-WINCatalog software program.