Rock Climbing Wall – Building a Climbing Wall in the Garage
My wife and I have been climbing for a few years and spending quite a bit of money for our monthly climbing gym membership. While we would usually go about 3-5 times a week, it was always a chore to get there in the first place.
In the past, I spent a few hundred dollars on some weights and since then, have never felt the need to sign up for a gym membership. Whenever I felt like it, I’d pick up some weights and do some reps. I’d do this fairly often and through out the day. So it started making sense to take that same idea and apply it to rock climbing. So we built a rock climbing wall, also known as a bouldering cave, in our garage.
Planning the Bouldering Cave
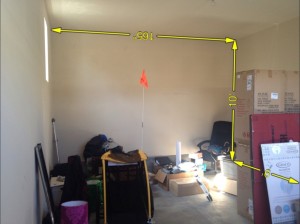
We have a 3 car garage but only one car, and we don’t have a lot of junk being stored in it. So when we first moved into our new house, here in Boise, our garage was feeling quite empty. The third car port didn’t have a garage door opener on it, nor did it feel like a car should go in there. The area itself just seemed perfect for a bouldering cave due to it’s U-shaped walls.
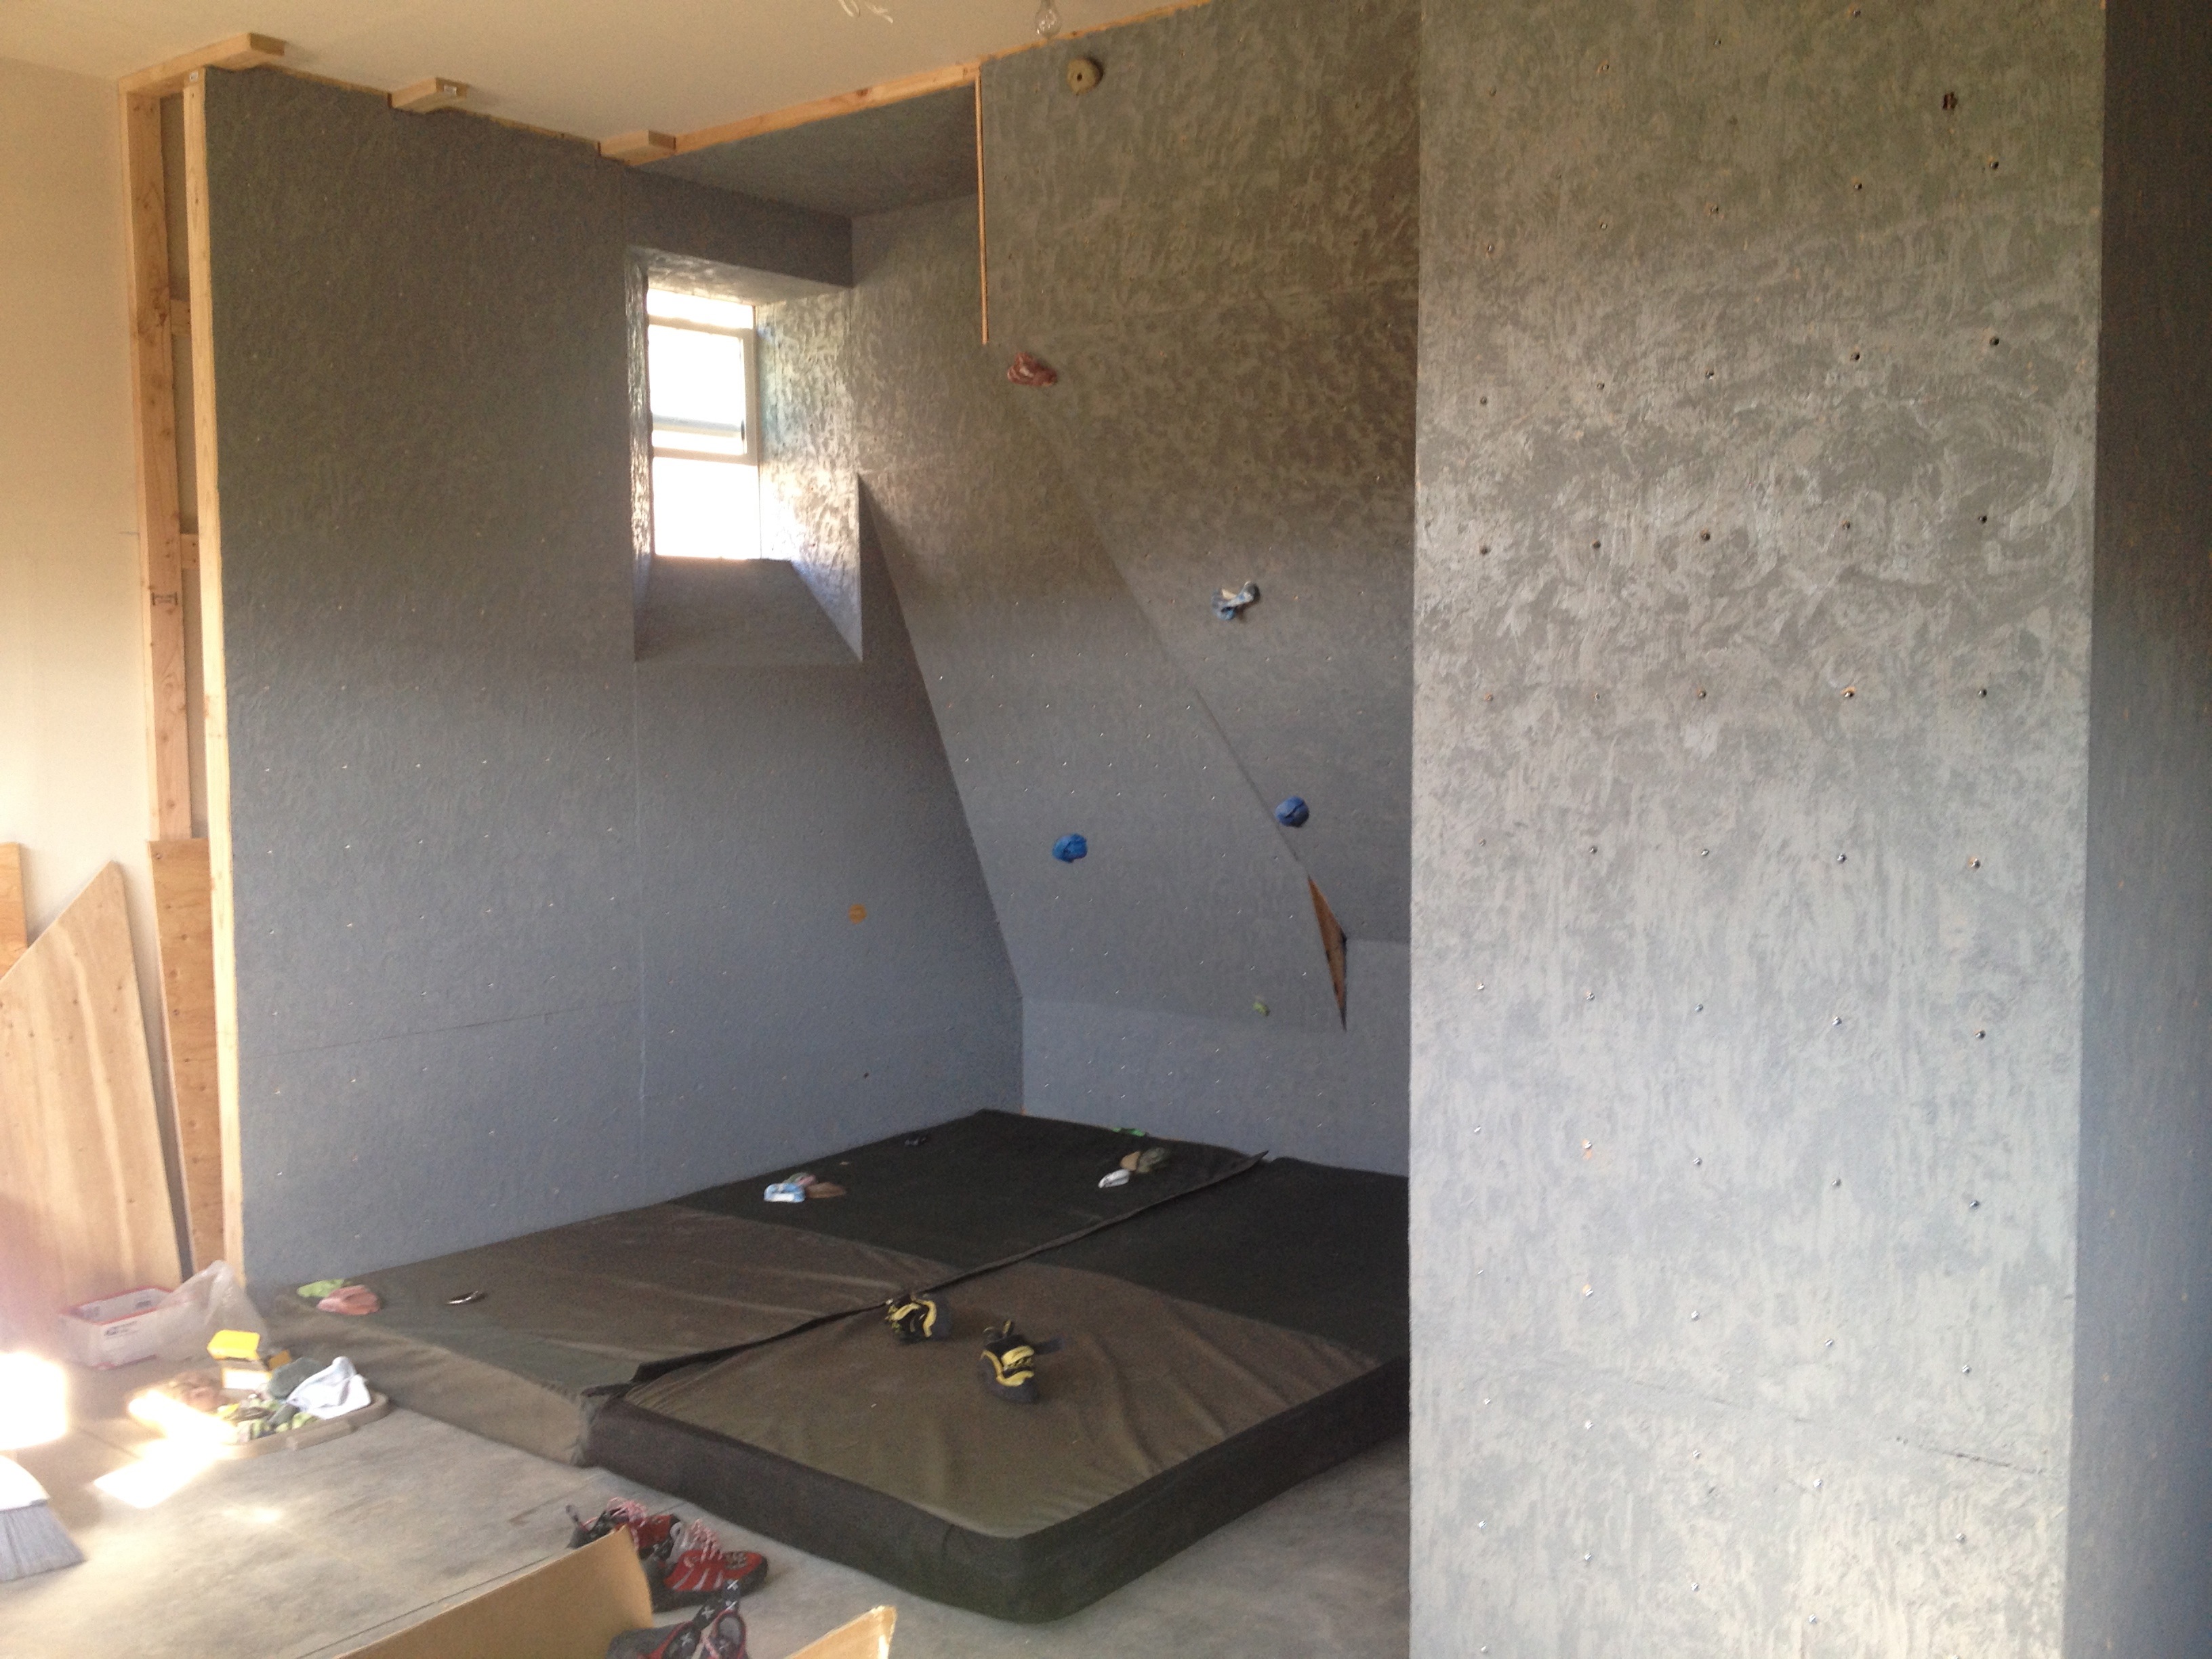
We did some research on cave designs and knew we wanted a 45 degree wall. Vertical walls are almost useless and a waste of effort. One problem was, we had a window on the left wall that we didn’t want to cover up. This would allow natural light to come in while we’re climbing and not have to burn electricity while we’re out there during the day. It would also allow cooling and ventilation in the summer so we just had to keep it open. It turned out to be a bit of a problem as a 45 degree wall would come right out and cover part of it up. We spent almost an entire day planing it out, thinking about pros and cons about different wall designs. We decided to make a 30 degree wall next to the window and a 45 next to it against the other wall.
We then decided to extend out and wrap around the dividing wall for some extra climbing surface. These walls are flat as we didn’t want them to jut out and take up more space, but they can serve as walls for kids or extra distance for traverse warmups.
Tools
We borrowed a lot of the tools from friends since there was a ton that we ended up needing.
- Circular saw (a table saw is better to cut the longer plywood)
- Chop saw – perfect for cutting angled 2x4s
- Plug in hammer drill – the hammering feature helped drive in screws to concrete.
- Power Drill – the ease of portability, the downfall of recharging batteries a lot
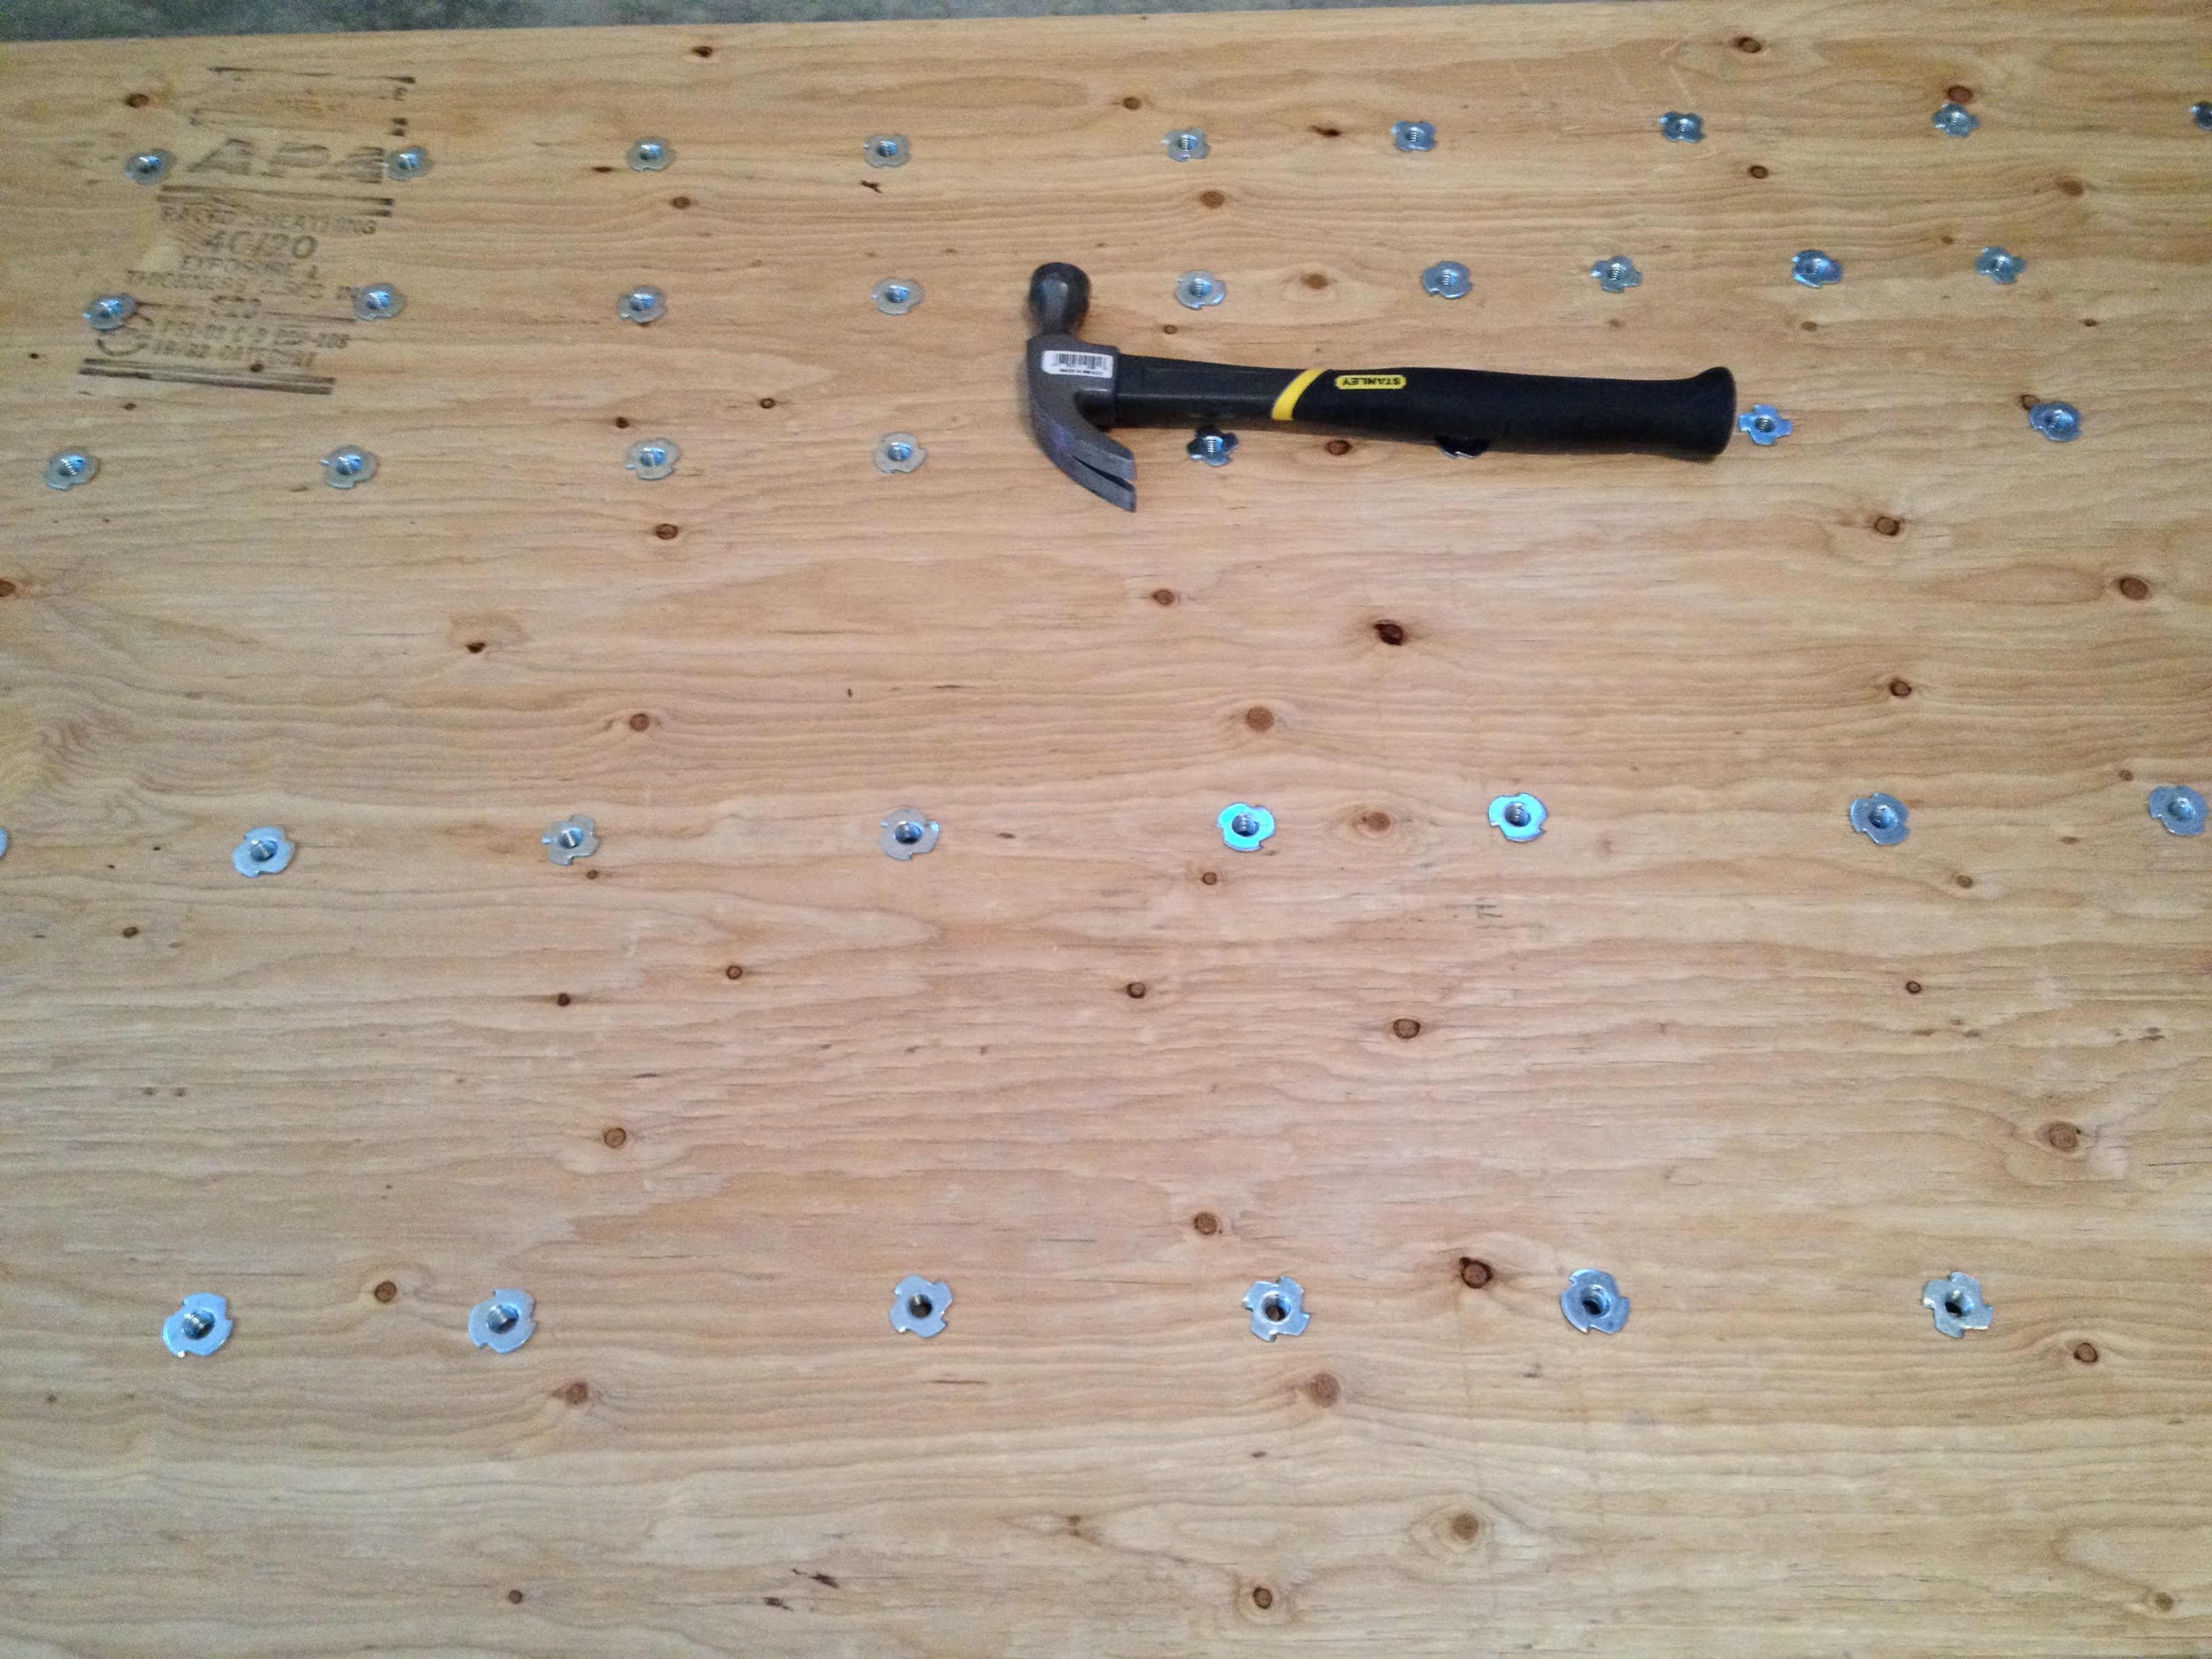
- Hammer – for hammering in the T-nuts
- Measuring tape – measure twice, cut once. Also great for planning and visualizing angles and how much material you’ll need
- Clamps – When you only have two hands, holding up plywood and other pieces of wood becomes a lot easier once you clamp them in place before screwing it together
- Drill bits – for various pilot holes, but also a special one for the t-nuts.
- Belt sander – sometimes you’re a few millimeters off and instead of recutting, you can just sand off that extra length. We always cut a tad long, sanded it down and made everything fit with high precision.
Materials
We made a ton of trips to the hardware store. This was mostly because we ended up wrapping our wall out and around the dividing wall that was there so we needed more materials than we first expected. We also were generous on the use of screws since everything needed to be tight and snug. Any movement of the wall as we pulled and climbed on it, would be a jarring experience as rock shouldn’t ever move.
- 5/8 inch plywood – We calculated the area, then added a few more for waste and extra features
- 2x4s for the main structure
- 2x6s for various structural componets such as tying into the ceiling and wall
- Concrete screws
- Wood screws of various lengths (2″ – 3 3/4″)
- Liquid nails – to glue the wood to the concrete after screwing it in
- Wood glue – ended up using vary little of this, but definitely needed it in a few places
- 800 t-nuts – we put t-nuts every 6-8 inches apart in the plywood
Structure
We built a frame for the wall in front of the actual wall to allow us to get back inside to fix fallen t-nuts and inspect the structure in coming years. This took some space away for climbing as it made the inner area smaller, but it’s well worth it and necessary.

Once we were done with the framing, we could build out the angles. Using clamps to secure some 2x4s at a 45 degree angle, we prototyped what the wall would look like. We sat under it to get a good feeling for what it would be like to climb at that angle and height, and moved the 2x4s up and down, adjusted the angle by a few degrees both ways and got it to “feel” right. Once it felt right to us, we screwed in the 2x4s and took off the clamps. We did this for the 30 degree wall as well to get it to work with the window. We had a little less choice with that, since a wall that was too steep would come out and cover the wall, so we brought it out as steep as we could to hit the top corner of the window.
With the main structure in place, we finished up the framing of the angled walls.

Facade
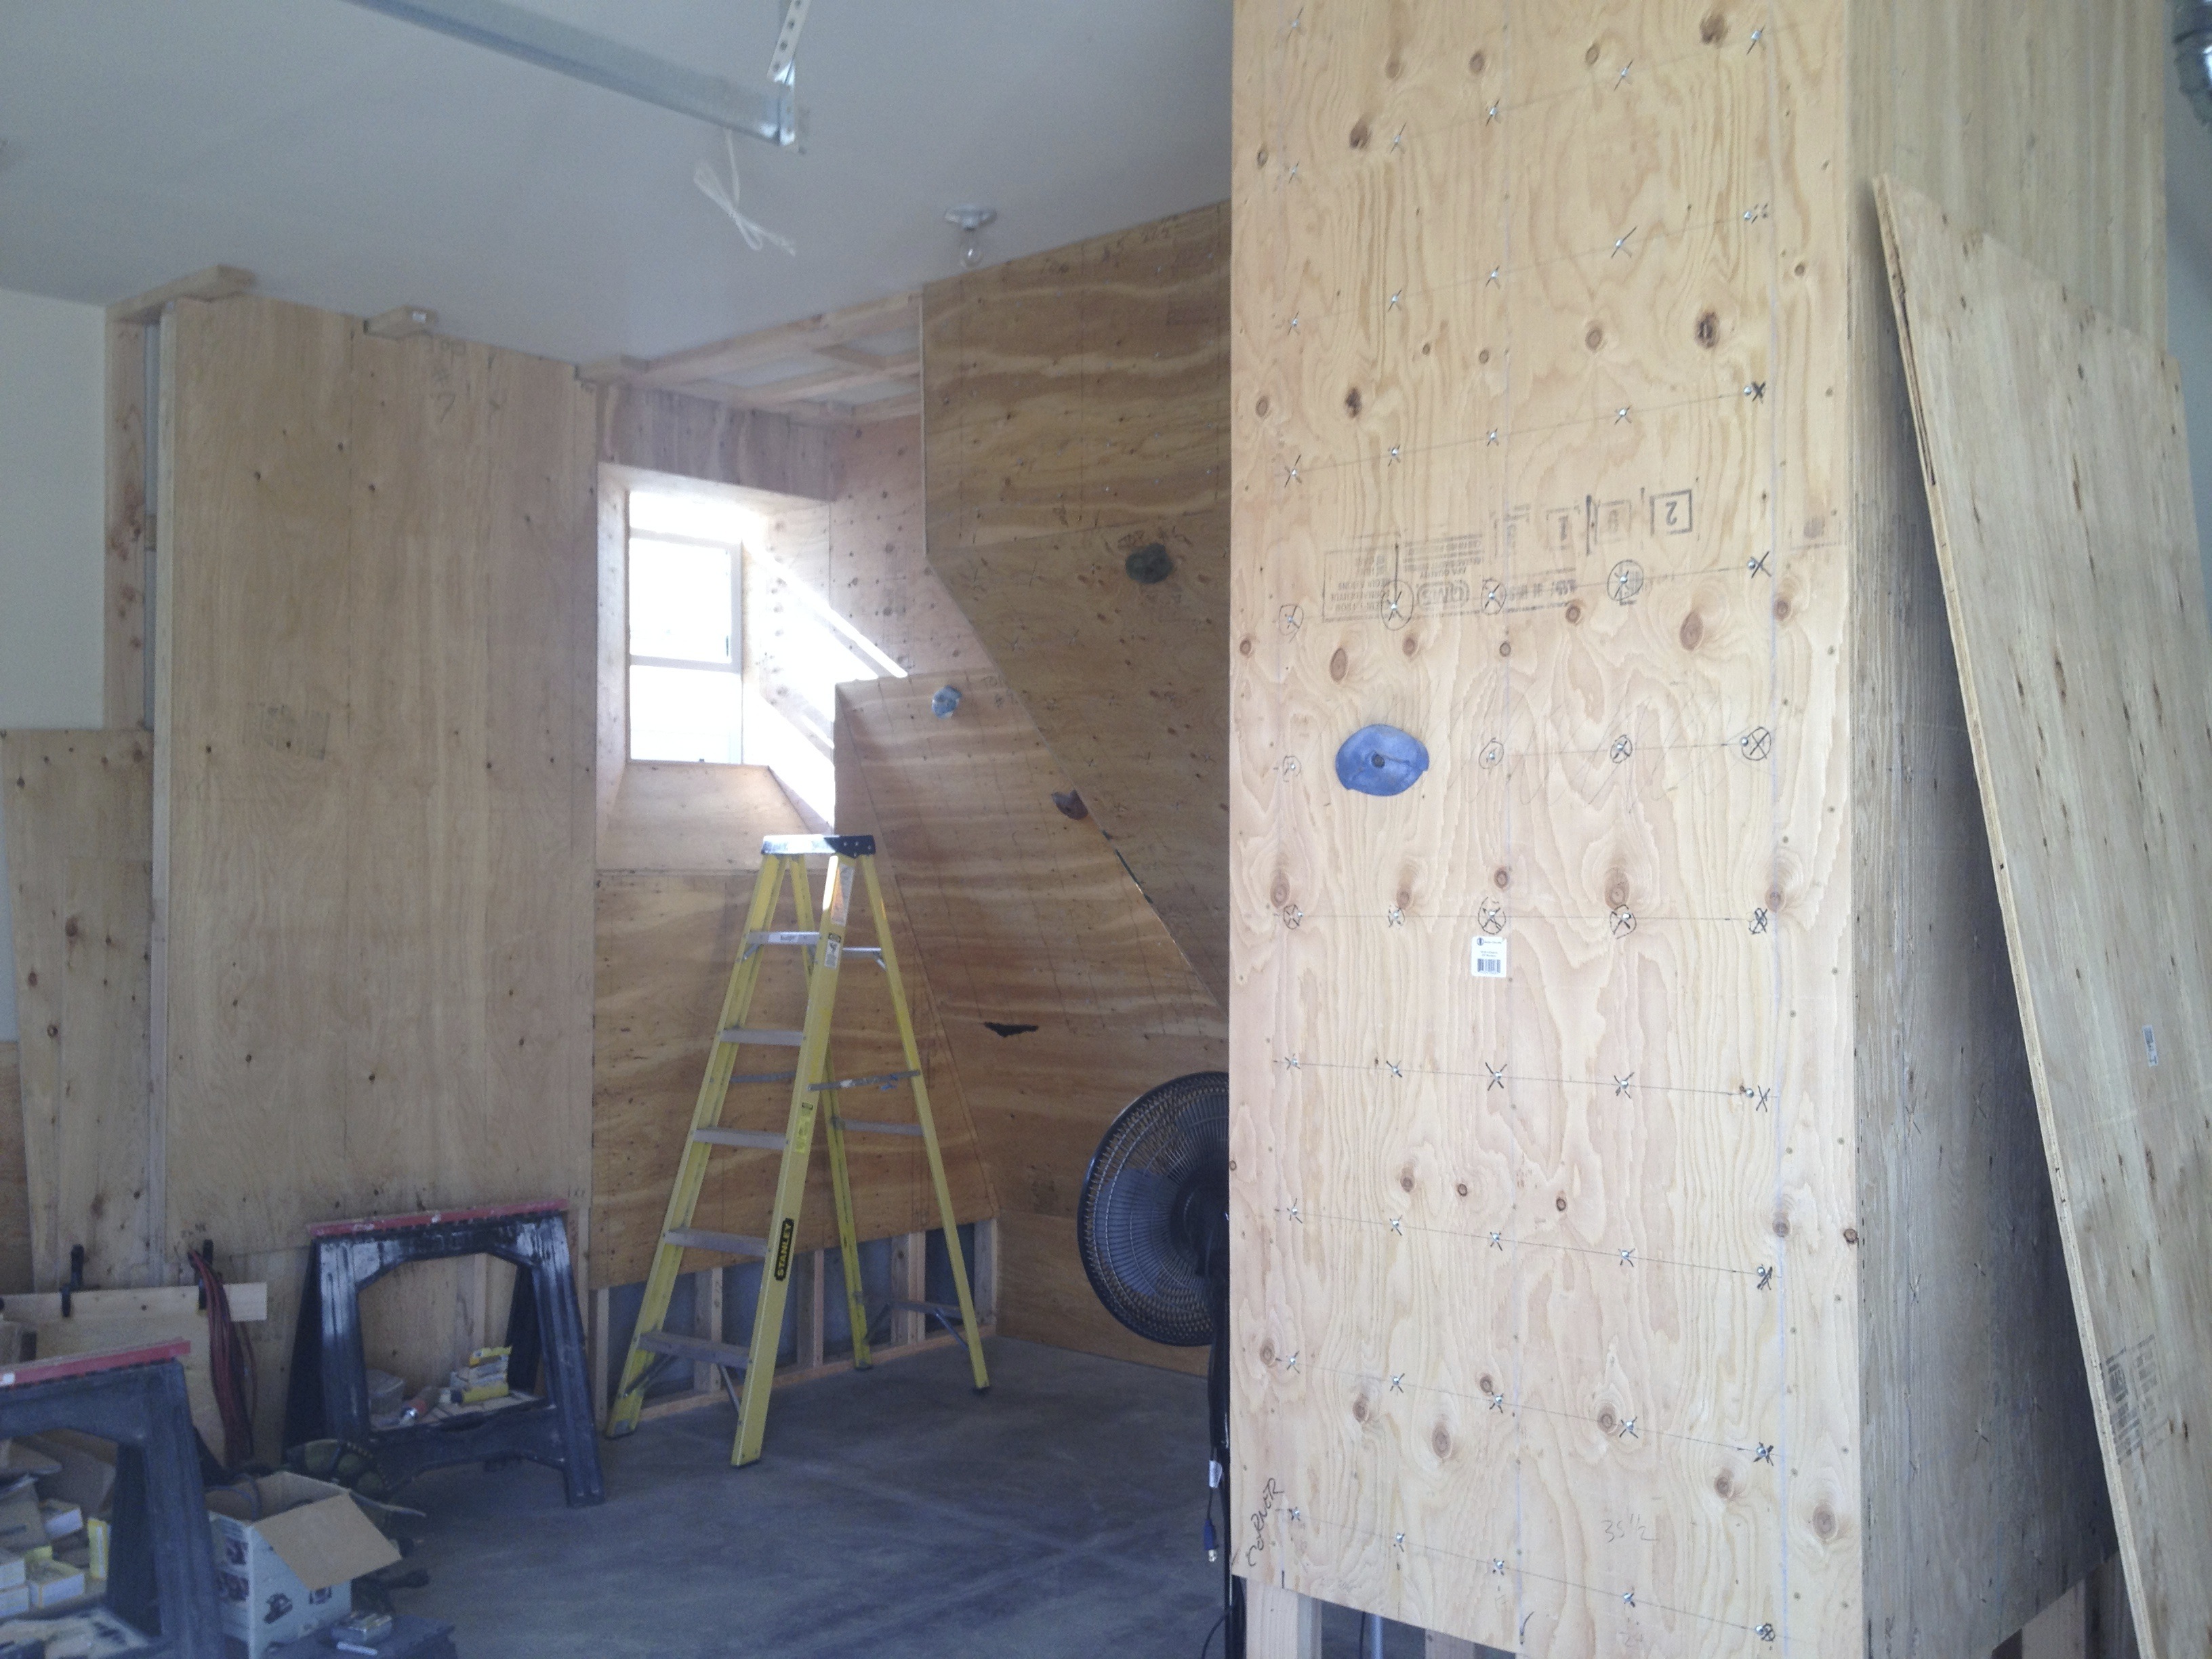
Once the frame was done, we started measuring and cutting the plywood for the wall’s face. We tried to keep waste to a minimum while cutting and planned out the cutting of the 4’x8′ sheets. We actually made the frame 8′ deep and 8′ wide to best fit the plywood. You can’t reliably climb on a wall that doesn’t properly span studs. It’s just not sturdy enough, so each piece needs to span multiple studs.
Once the plywood was measured and cut, we had to plan out where the holes were going to go, keeping in mind any adjacent walls. We ended up putting holes about 8 inches apart, starting 4 inches in. This allows us to avoid any studs on the edges, while keeping holes 8 inches apart spanning sheets of plywood. On the vertical, we had to keep in mind the widths of the holds and also try not to put them too close to the top or bottom to make them unusable. We marked out the studs on the plywood so we wouldn’t drill into them. If our holes came close, we’d nudge the marks left or right to avoid them.
The planning for the holes took a long time but once we marked them out, it was quite quick to drill the holes out and hammer in the t-nuts. We placed some scrap plywood behind the board we were drilling so the back wouldn’t splinter and blow out.
Texturing the climbing wall
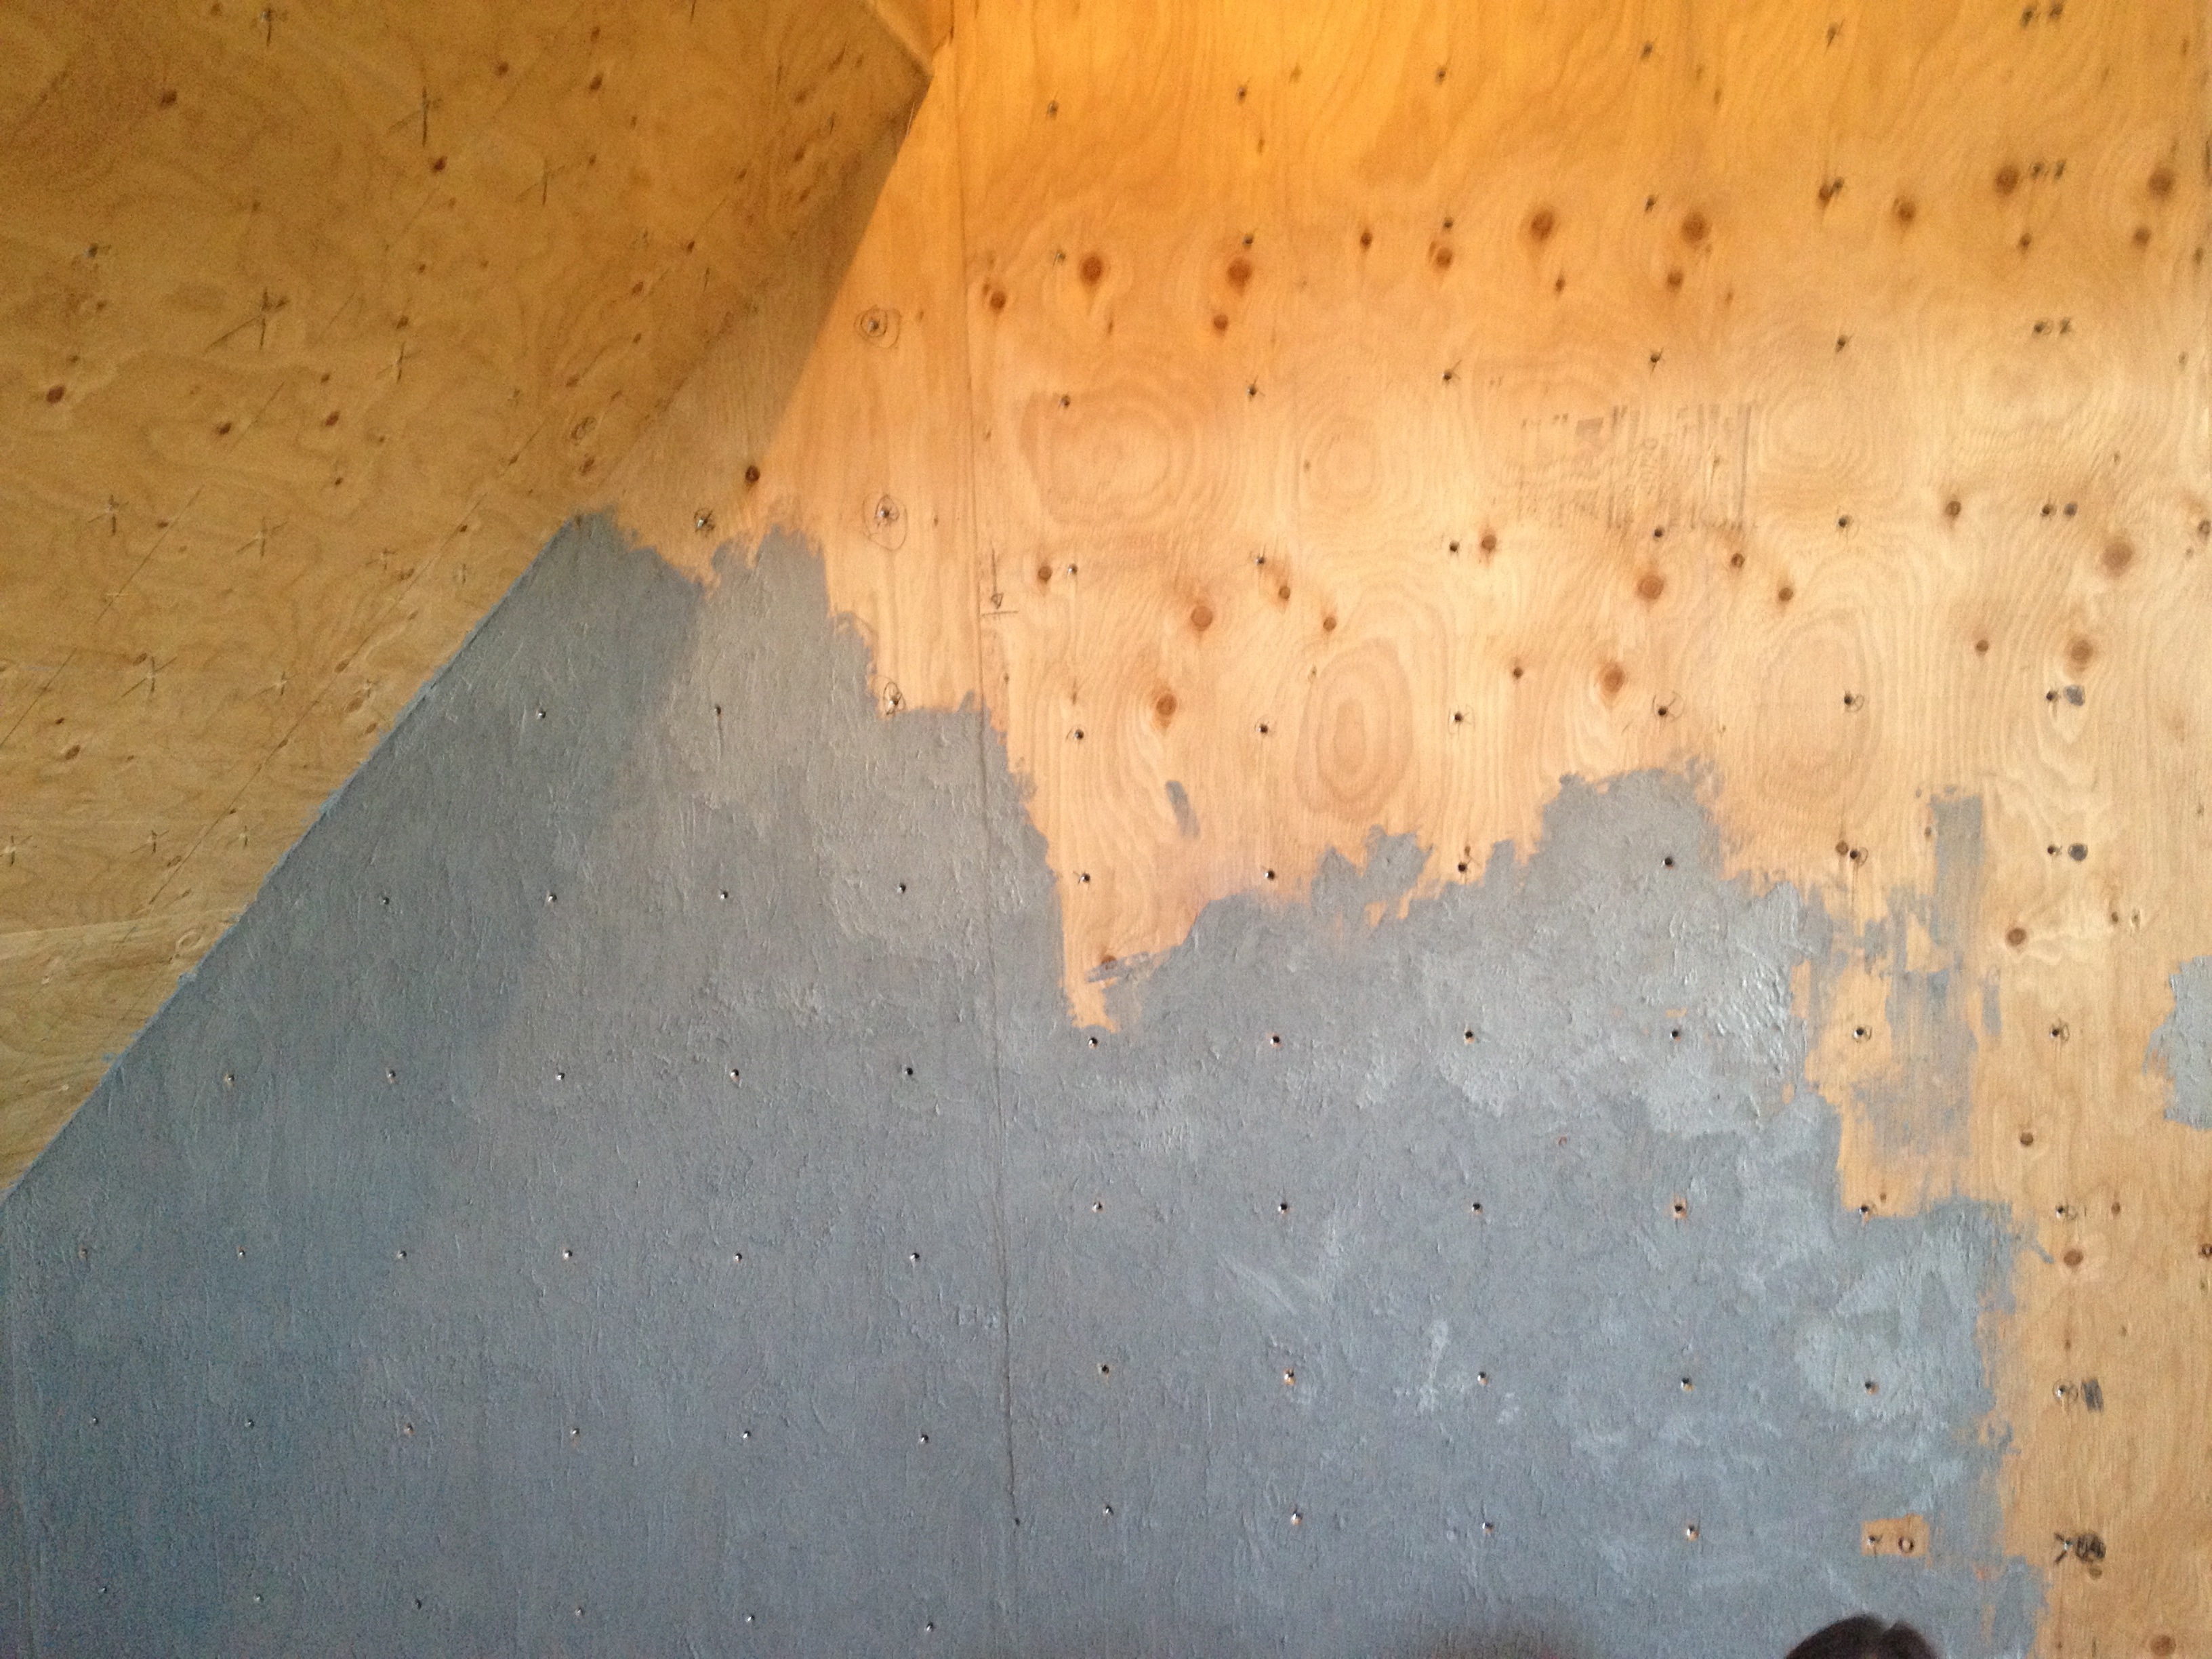
Having something in your house, especially something you built yourself, should a source of pride and beauty. We knew we didn’t want to leave a plywood colored structure in our garage. Besides, the splinters alone are a pain. Also, using climbing shoes on a flat wooden surface doesn’t simulate anything except climbing on plywood. Instead of just painting it (which would have solved the splintering issue) we decided to research some texturing. We found some recipes for mixing sand with paint and joint compound but that seemed like a hassle. We happened across some deck restore that will take old wood and apply a concrete-like layer on it for a hardened surface you could walk on. You can even color it too. We bought a small amount to test it out and it worked beautifully. It’s very thick and heavy so we had to apply it in thin layers but the end result is like climbing on rough granite. Smearing is awesome.
Crash Pad
Like most garage floors, our is made out of concrete: one of the hardest materials known to a human’s skull. Not wanting to use concrete as a cushion we commissioned  Baboon Climbing to build us a crash pad that could fit in the space we had. What they came up with was a folding mat that we could break apart in the middle and use the smaller pieces around the gym. They did a great job and while it’s definitely softer than concrete, falling from our 10 foot tall bouldering cave is almost enjoyable, knowing they’ll be a soft but firm landing at the end.

Climbing on our Wall
We’ve had a bunch of fun on our wall since finishing it, but I think the most fun is had by the kids that come over and climb on it. We left some flat walls for them and we plan on adding large features to the others to make them more interesting. As you can see, we have two flat walls facing each other that’ll let us add features, but there’s also two other flat walls that wrap around the original dividing wall that can be used.
Starting your own project or have questions about ours? Let me know in the comments below!